Good evening my fellow tech pilgrims, it’s good to be here with everyone and I wanted to start by apologizing for missing last week’s session. Here in Seattle we had the Superbowl and a good portion of the town and city wasn’t going to miss this opportunity. So definitely need to apologize for missing my deadline. This also was a bigger project than I realized and I have to admit I have had to trim it down a lot in order to stay focused on the main objectives that I want to achieve. This post is heavily inspired by Patima Poochai’s article I cited last week.
Objectives
So I mentioned about the objectives here, and this is the direction I’ve been wanting to go for my home lab. Where we live, we have a shared router/gateway from our ISP provider that services the whole house. Thankfully it doesn’t have any strength deficiencies so, everyone is able to get the internet they need. But of course me being me I wanted to take this a step further and build a home lab. One of the most rewarding things you can do if you have extra PC parts lying around is to give them new purpose and let them live on in other ways as network devices.
Where it stands this is probably my 5th or 6th iteration of this phase of the project so the more I repeat certain parts the better I get at remembering them. The purpose of this project is to build a fully functioning home-lab and to use it for testing out new tools and hosting services on it. But that’s just the general high preview of everything.
The purpose of this article is to work on getting the first critical parts completed and running. That includes the following hardware:
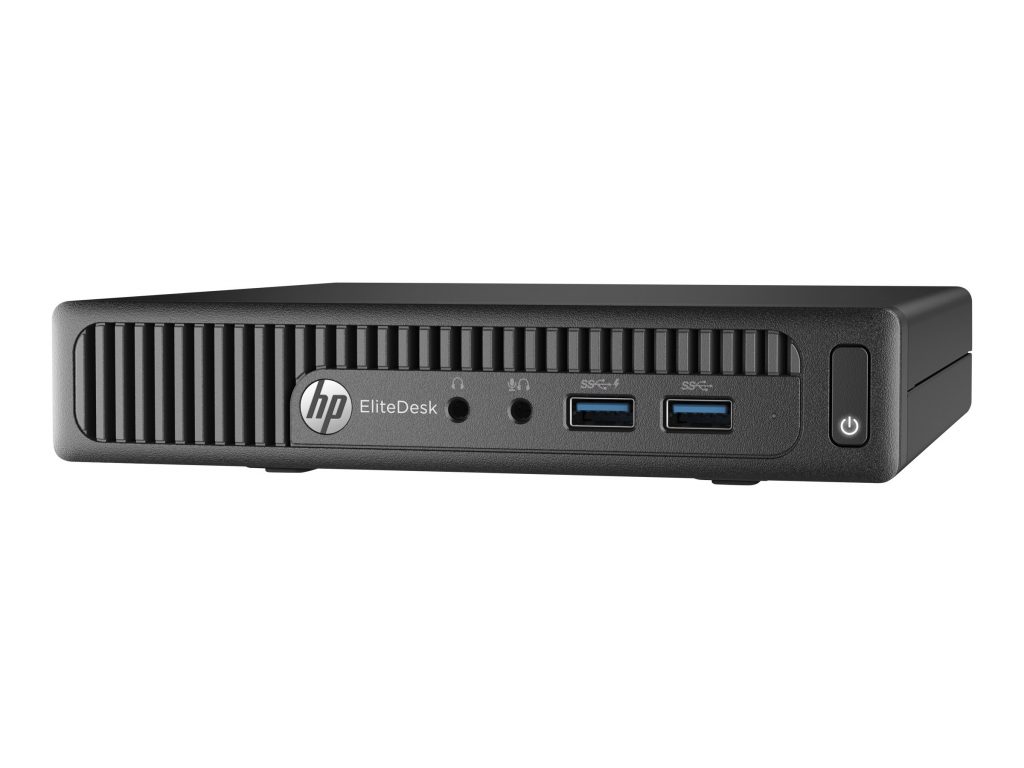
- I am my router on an HP Elitedesk 705 G2 with an AMD A10 processor mini pc and 16 gb RAM, I threw in a 250 gb SSD which should be more than enough hard drive space.
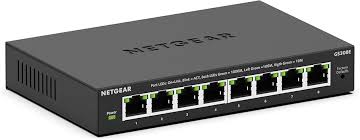
- Using a NETGEAR 8-PORT GS308E managed switch
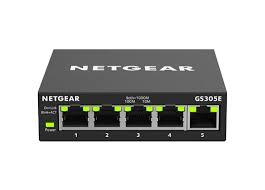
– Same with a NETGEAR GS305 unman-aged switch for my different devices that I use, for day to day work or back up PC’s I have in case one is offline.
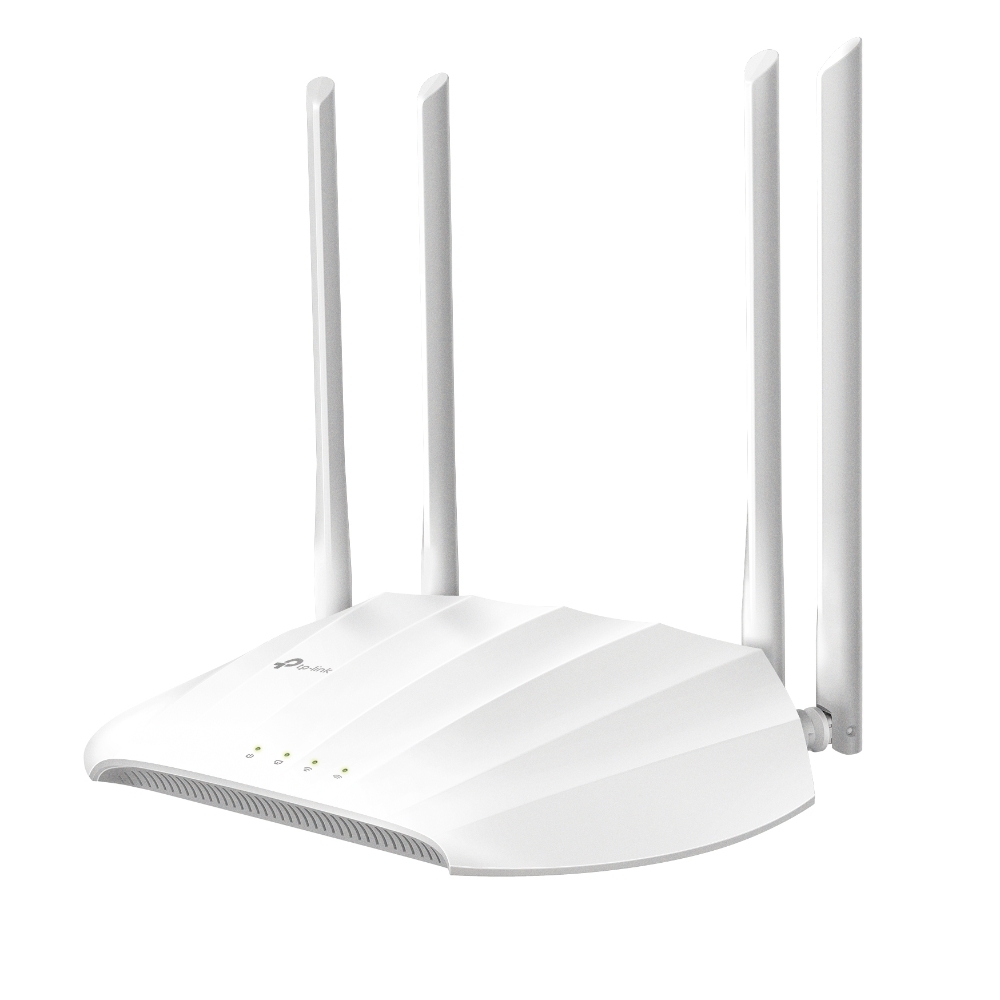
- My WAN is a TP-Link AC1200 (TL-WA2201) Dual Band wireless access point, it is set to Wifi Extender mode
Road-map for the future
Since these are the first components that I’m building, my eventual plan is to have the following setup for my network. This network will be used by my partner and I for our day to day use, lab experimenting, and a cyber security research lab. Basing my study off of an article and write up of the Network Guy I’m going to split these networks up into separate VLANs so I can keep traffic separated from layers that either don’t need to be exposed to the internet or exposed in a configured and hardened way. This is something that I had in mind:
VLANs
– Guest Wifi
– DMZ designed for public facing services
– Management (managing network and network communication)
– IoT – put this up later mostly need wifi dmz (public wifi) and managing internal network.
Now that we’ve got that out of the way lets focus on the parts we need to configure.
Extender
So we’re looking to aim for a network diagram like this below
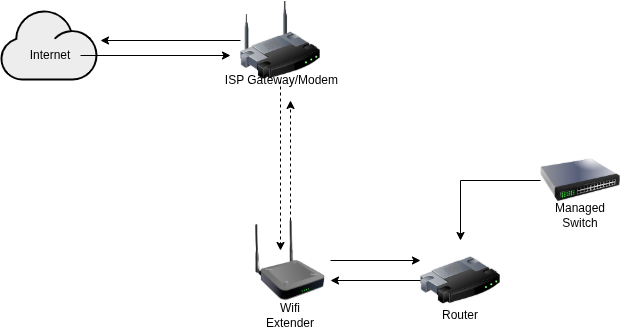
We need to configure the extender, the first step involves getting it powered on with the supplied power source. We need to run a patch cable and connect one end to a computer that we want to work with and the other end to the extender. Next we need to make sure that in our network settings we are connected to the extender it will have a hostname (also known as the SSID) usually in this type of format, since we’re plugged in through Ethernet that connection 9/10 times is automatically managed for us.
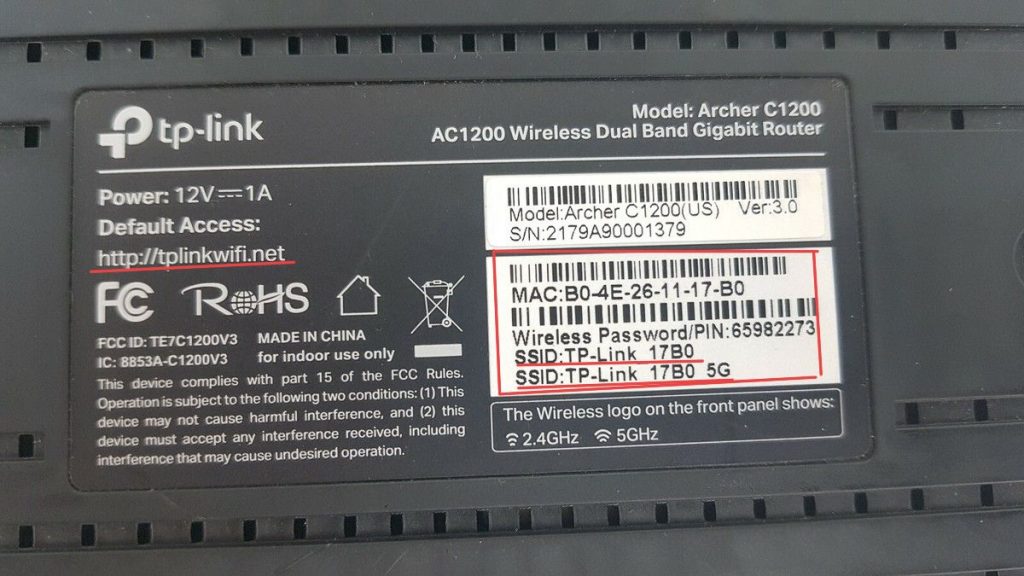
This above photo helps provide the example that we are looking for, we want to connect to the IP address that it is either attached to or we can try typing the URL that is also highlighted. This should take us to the admin portal that we want, from there we need to setup our extender so that way it is connected to our existing Wifi network for the main home.
I should suggest that at this point, much of the rest of the configuration will depend largely on your own personal needs and preferences. For my device in particular it has an automatic setup feature which allows you to enter the needed information for your existing network.
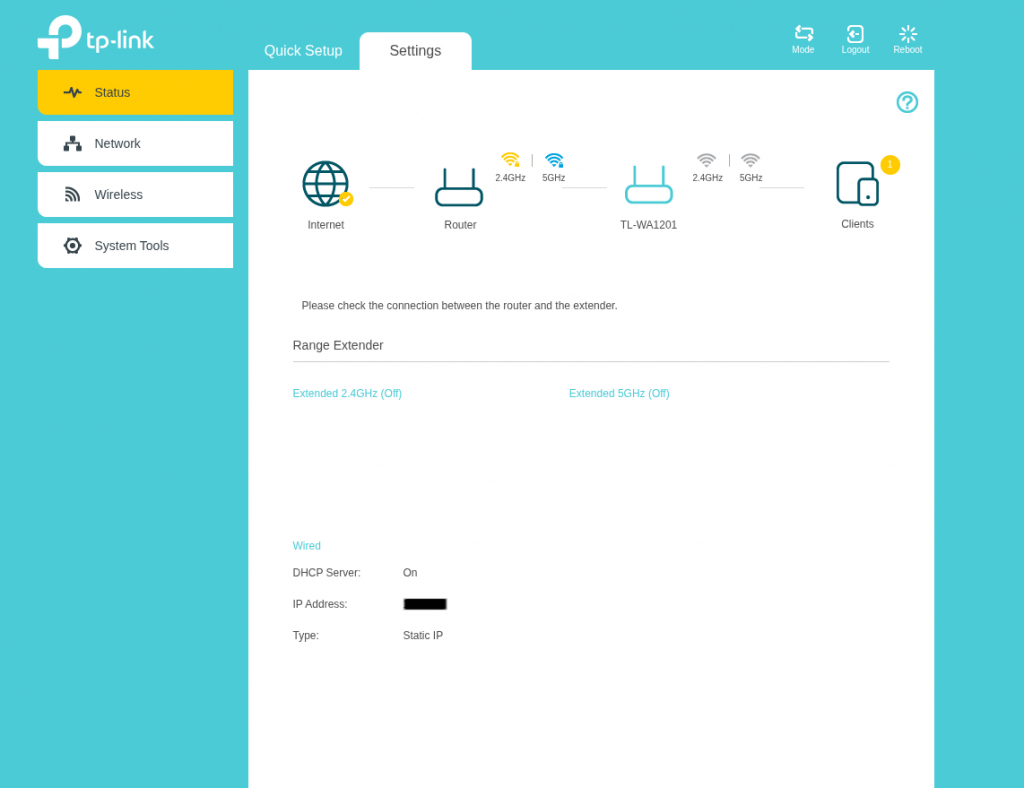
Once that’s setup, Patima’s article suggests to test your internet connection and to make sure that it is connected both ways to the internet. One feature that my device has is that it shows you a status graphic of whether things are working and functioning properly. Another good tip I recommend is to pull up a terminal and run ifconfig and it should show you what your network devices and the ip address is. Lastly, check that the network traffic is going from source to destination, run a terminal command ping 1.1.1.1 and then also run ping google.com this helps to confirm whether DHCP and DNS is working.
From that point we are ready to configure our network settings, I should say that it’s at this point where things kind of threw me off with configuring of the router so it’s very important that we make sure this part is configured properly. We can to set the LAN settings to the following:
– IP address: this is the device address, in a way it’s acting like our gateway.
– Subnet mask: this divides our larger network into smaller more efficient sub-networks
– Default gateway: is the address we put for our router gateway we are tapping into
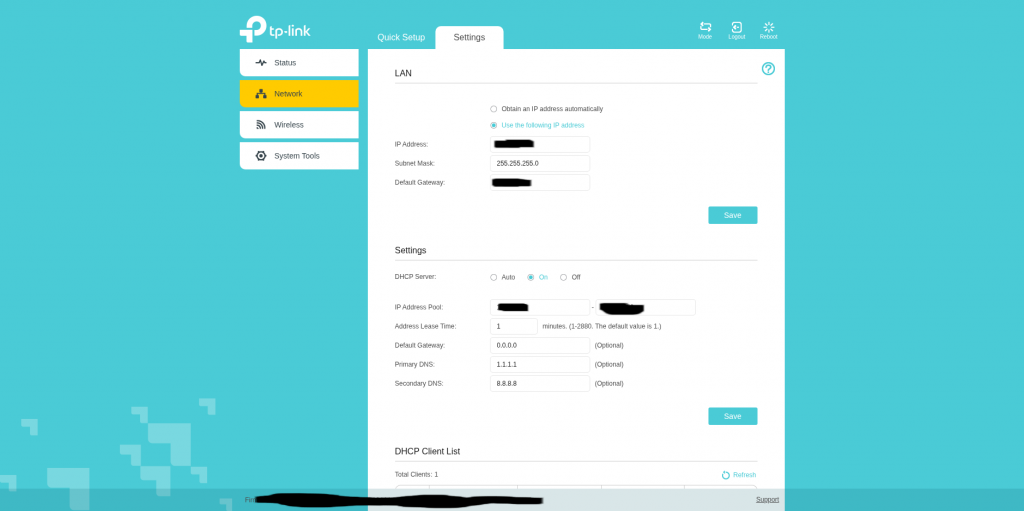
Settings:
DHCP server allows us to hand out IP addresses to all of our clients/devices that are connected. To be honest I’m still investingating this feature some more, I have DHCP enabled on my WAN side of my router, and it’s working fine but need to see if I turn this off if it’ll have any effect on the router and internet traffic. For now I have it set to on, the IP range you have to decide what you want it to be and how big you want your network to be.
What I suspect as well you define the DHCP settings very similarly to how you do it on your router (we’ll cover that in our next article). So it’s very similar to how things are in both devices. I leave the Lease Time for each address for 1 minute, the DNS servers I configure them to be 1.1.1.1 (through Cloudflare) and 8.8.8.8 (through Google). When all settings are configured to how you like them you are mostly done with the WAN part of the setup. Save and confirm all of your settings.
From there we go to the wireless menu, I only have this configured to connect to the existing Wifi network but not to extend it or broadcast it. The Extender is probably one of the most critical pieces of my lab so I don’t want others to get access to the gateway device and risk compromising it in anyway. I make sure the connected settings are correct with the existing network, extend network I leaf deactivated. MAC filtering I leave deactivated also because I don’t need to do that kind of filtering when I have the same feature in my router.
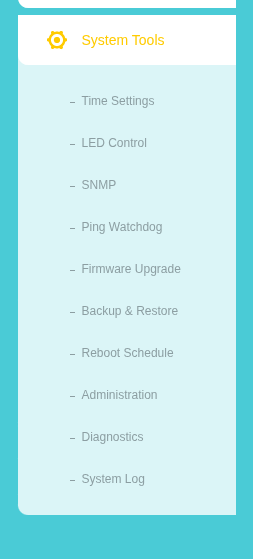
System Tools:
This is the last setting I configure, first thing I do is make sure that I have the correct time settings configured for this device. It’s needed many times for if I want to run some different admin jobs. I leave SNMP, Ping Watchdog, Diagnostics, and System Logs all unchecked. The only other settings that I’ve configured are my Firmware Upgrade, Reboot Schedule, and Backup and Restore. Backing up the system I usually save for last, because everything is at a point where I want it and it’s smart to back up and save your work. The other feature I place as really important is upgrading firmware, upgrading the device firmware is a good security health check to do to make sure you don’t risk running compromised and out of date devices. I refer you to TP-Link’s website to find out what new firmware they have available for download. This device through the admin portal has a handy upload feature you can use to upload the .bin file and run the update process. I highly recommend* when you do this you give the device the time it needs to finish the update. Lastly, I recommend you save the current version of your configuration before changing your password. That way if there’s an error that happens with the password you’ll have a backup you can pull from and update in place when you reset your device. Once that’s done, change your password using best practices for password creation to make it unique and personal to you. After that we should have everything configured with how we need it to be for the WAN and connected to our existing household network.
Closing thoughts
Well my pilgrims it’s been a good step so far to get this first part complete, the part I had trouble making sure that was configured correctly was the DHCP part of the WAN. There’s a similar setting that comes up when you’re setting up OPNSense. So I might leave this setting I did as is or change it down the line. At the moment everything is working, and the DHCP part that I have configured for the router is working and pulling a different numbered network range. Think of the ISP network being like a 198.1.1.xxx range, while mine is a 10.0.0.xxx range so that tells me that at least the WAN side of things in the router is working and pulling from my subnet I have set up for my home-lab network. I think in someway though the DHCP is still pulling from the ISP provider, because when I run an Ookla Net Speed Test it’s showing up as the provider server being from our ISP. But I’ll take the win for now. Thank you for sticking around through this setup next week we’ll start working on setting up OPNSense. We’ll do next weeks article on the configuration of the router, and then do some customizing of the router to get it to a status we want. Time to go journey some more in our wilderness, until next time, catch you at the next oasis.