Good afternoon my tech pilgrims it’s great to be here again with you again for another article in the series. We’re going to focus on building the OPNSense router and getting it installed. We’re going to recap a little bit since last week and go over the parts that we have available and document how they’re going to be used.
Recap
Last week we talked about the process of setting up our gateway in our network map that we set out for ourselves. We were able to get some core crucial components set up for it, this in essence is a wifi extender but it’s critical role that it will serve is as our gateway. I set this up with the relevant information of our home network that we share with the rest of the house. It extends coverage in our area that we live, now this would be fine for everyday use my determination is to make it something that can service external services that I can access anywhere in the world. There are many more plans I have for this network but for now we’re going to focus on configuring the router which lies at the heart of our set up.
Step 1 – Cabling
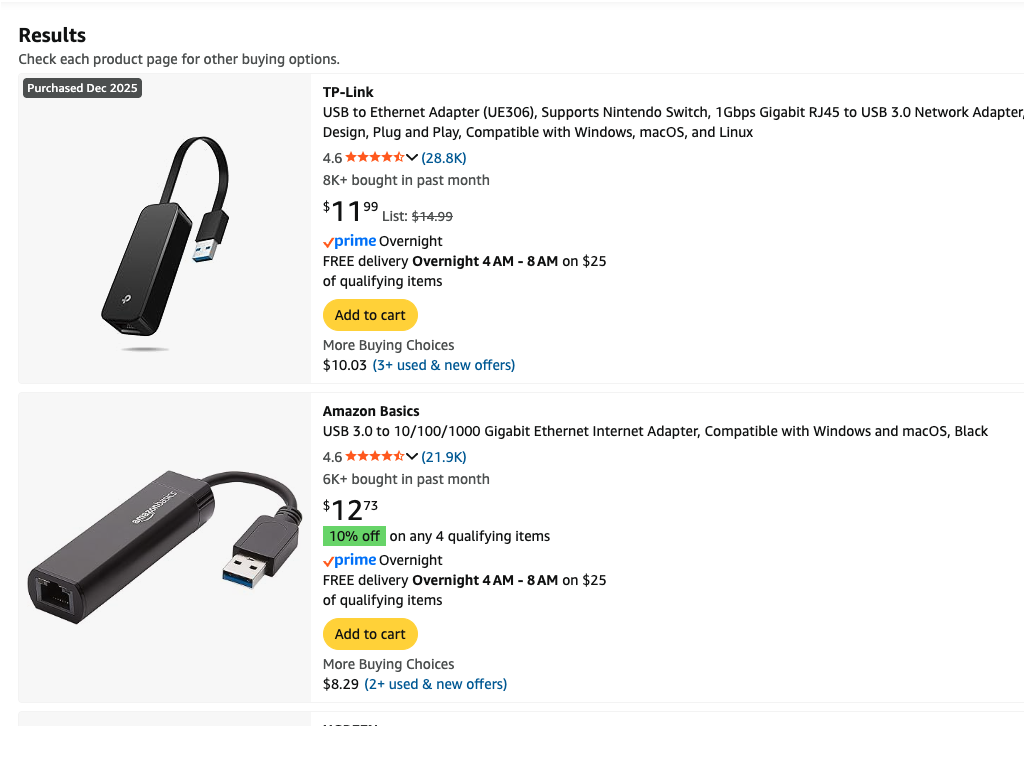
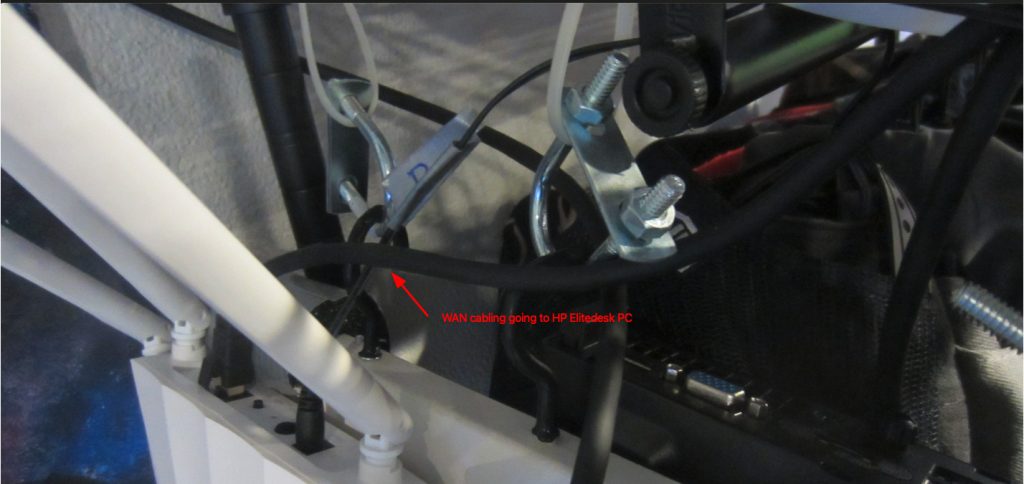
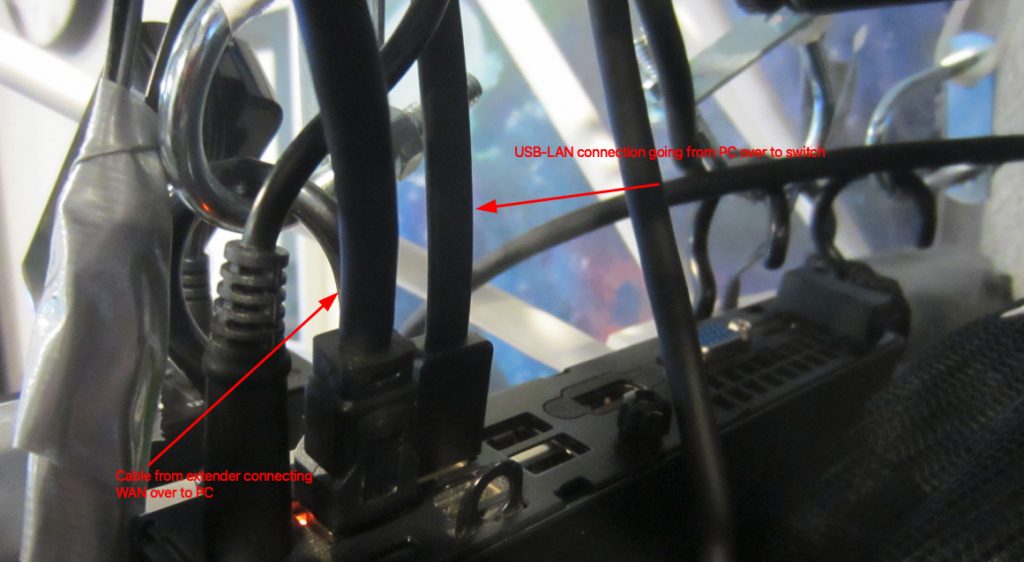
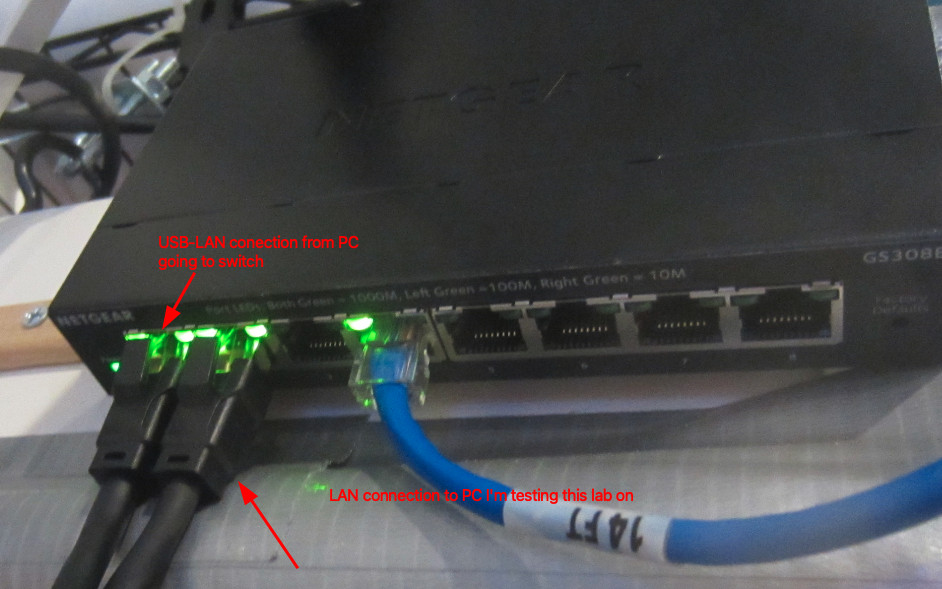
Configure all of the cables to plug into the gateway and the router, remember you want a direct WAN to LAN connection from the gateway device (Wifi Extender) to the router device that you are using. Next you need to somehow get another RJ45 connector to connect to your managed switch from your router. For me I am using something like a TP-Link UE306 USB to Ethernet adapter or a basic Gigabit Ethernet Adapter from Amazon. Both look like something like this below, me personally I went with a TP-Link gigabit ethernet adapter and plugged it into a usb port on the back of my HP Elitedesk small form PC.
From there I connect a small gigabit ethernet patch cable to the smart switch, hypothetically this should take care of the simple hardware and cable management that we need to arrange.
Step 2 – Hardware configuration
Now we need to prep our router to install the image of OPNsense, you can find the download iso here at there website, https://opnsense.org/download/ . A note about choosing which iso file to download, I played a lot between using pfsense and OPNsense. Fundamentally they are running the same system under the hood, and that’s FreeBSD. Although I did try and install pfsense on this particular PC I set aside for this lab I kept getting kernel panic errors when trying to run the demo iso file. I don’t know if this was as a result of driver firmware failing to install, or some other issue happening in the boot process. I did also mod the PC in a slight way, I found in other iterations of this router demo and build process that DHCP resolution was being funneled through my wifi interface. Another take on the pfsense decision is the upcoming hardware modification that I did might’ve cleared up this kernel panic message I was seeing. I decided not to go into Without getting too ahead of myself an interface is something you define in OPNsense as to what you’re going to be using for internet traffic, I could be wrong about this but it helps set up the proper routes you want traffic to go in and out of.
What I did find when I rebuilt this router several times is that almost always traffic was being routed through my ilfwifi interface. This can be found out when you run an ifconfig command through the terminal on OPNSense it will display the interfaces it detects and you can decide and define what interfaces you want to route from your WAN gateway to the LAN you’re building right now. Now USB to Ethernet adapters are pretty good so far with being detected and used as interfaces for you’re respective routes you want to build and connect.
So to remedy this I wanted to make sure that the Wifi NIC wasn’t being used at all, so what I decided to do was to identify the Wifi NIC and remove it from the mother board. This is a relatively easy process to do, I recommend if you’re following along with this walk through to make sure that you look up and follow the tech specs that are provided from the PC maker you are using to install OPNsense to. After the Wifi NIC is removed I duct tape the data cable leads individually and make sure that I label them with the proper connections that they came off of from the NIC. This does one of two things, the tape isolates and shorts from taking place with the cable leads, which helps to minimize any hardware errors from taking place. The other is once the cable leads are connected, it’ll help your future self to make sure you know which leads go where should you need to reattach the cable leads to the NIC again. When this is done you can put the PC back together. Now you should note that there are most likely a lot easier ways of doing this but this was something that I wanted to almost guarantee would divert traffic to my USB – Ethernet connection. Also this step is not mandatory data traffic will go through USB – Ethernet connection since the light to the connection was flashing before I did this small hardware modification.
Step 3 – Image the ISO file to a USB
Now we are ready to install OPNsense, navigate to the website I linked, and select the vga option to download the file to image to a USB. Using your favorite imaging software a list of some are provided :
Now we image the file to a usb, and now you are ready to install OPNsense.
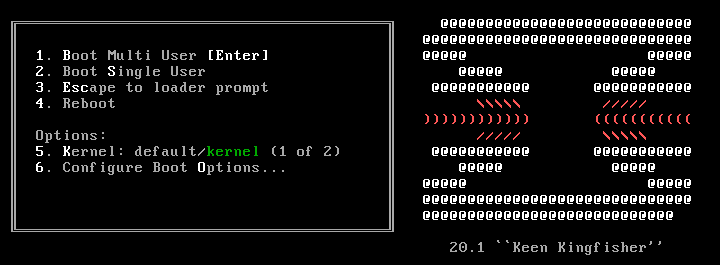
I recommend connecting an external keyboard, mouse and monitor to help with making sure that the installation goes according to how you need it. Boot up your system and enter the BIOS menu, choose your boot menu and select the USB option that matches the one you imaged before. You should start seeing a boot up screen that looks somewhat similar to this one below:
Before we install the image we are going to go ahead and assign the interfaces to the respective connections. One way to do this (again there are definitely easier options and methods), would be to wait for the
manual interface assignment: to pop up, this is usually shows up in the boot up process and it’s usually the second pause, it shows up with a 5 sec countdown. This allows you to have the option of selecting any type of key. I borrowed this screen shot from the HomeNetworkGuys channel and his video OPNsense Full Network Build (2025 Edition)
Step 4 – Assign interfaces
This is the next steps you would do to assign the interfaces that automatically get detected, however in this case you would need to know what interface is which, in this case for the Home Network Guy’s example his interfaces show up as follows:

In our example we’re going to wait to till the boot up process finishes and then we’re going to login with the password and username root, and opnsense. Once we login we’re going to hit option 8 for shell, and then type in ifconfig (this is installed by default). This will show all of the interfaces that are plugged into the device. We now need to plug in and out each of the ethernet connections, and re-run the command again. By plugging in and out each ethernet connection will show which one is which. When you determine what connection is which keep track of which one is for the WAN and the other for the LAN. In this case for my device my interfaces are bge0 for the LAN and the interface ue0 for the WAN.
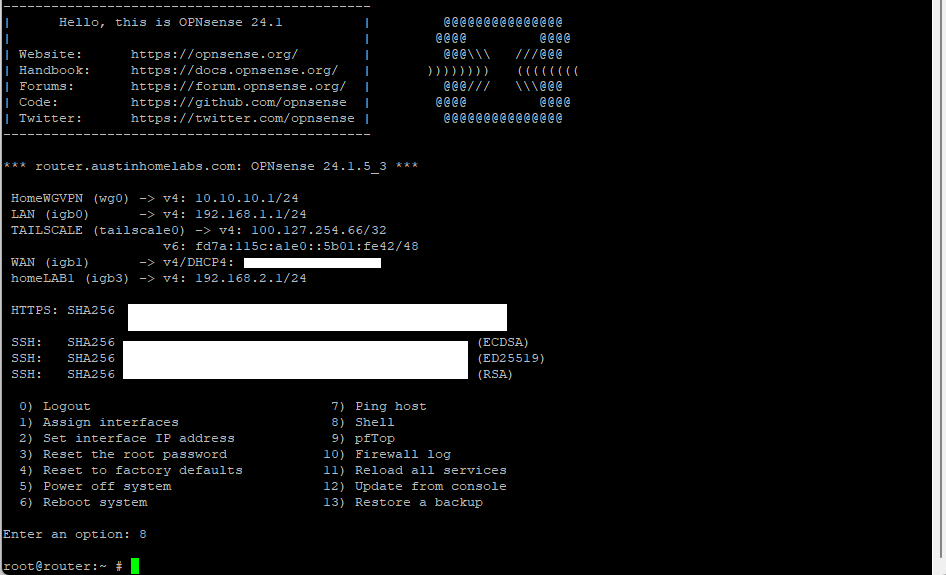
This might be a clunkier version of finding out the interfaces, and believe me there are definitely easier ways. But unless you found which interface is which you’ll know for sure what interface will follow our network topology and plan. To exit the shell prompt we can type exit and we’ll be taken back to the main menu, once there we can select option 1 to Assign Interfaces

We’ll be prompted with an option if we want to configure VLANs and LAGGs for now we’re going to say no to both of them.

The system will show us which interfaces it detects, now that we know which one is which under the prompt to select the WAN we’ll enter ue0 for our choice. The system will then ask you to configure the LAN, it’s very easy to skip this part (at least it was for me) so when we get to this step enter bge0 for our LAN and after that part we’ll be done. We’ll be asked if we want to configure an optional interface, but we can hit enter and it’ll ask us if we want to confirm our answer. We’re going to hit y for yes, and it’ll confirm our selection.
The login screen will pop up again and our LAN and WAN interfaces will be set and configured, we’ll see a default LAN IP address of 192.168.1.1 and for now we’ll leave that set to default. Remember at this point we haven’t installed the system yet we’re still in the live environment. We’re going to do one last check, on the main menu we need to select option 7. We’re going to perform two tests to make sure DNS and DHCP are connected properly. We can select either one, this is the equivalent of doing a ping test in a terminal. Same idea and concept, so for my purposes I’m going to ping the IP address of the Google name server at 8.8.8.8 . If you come back with no error messages and that the ping tests were successful we know that DHCP is working. The last thing we can do is the same type of test again but to test that DNS is working, type in google.com as the result to test. And same thing if no errors occur and all packets have been delivered then we’re good to continue with the install.
Step 5 – Install Process
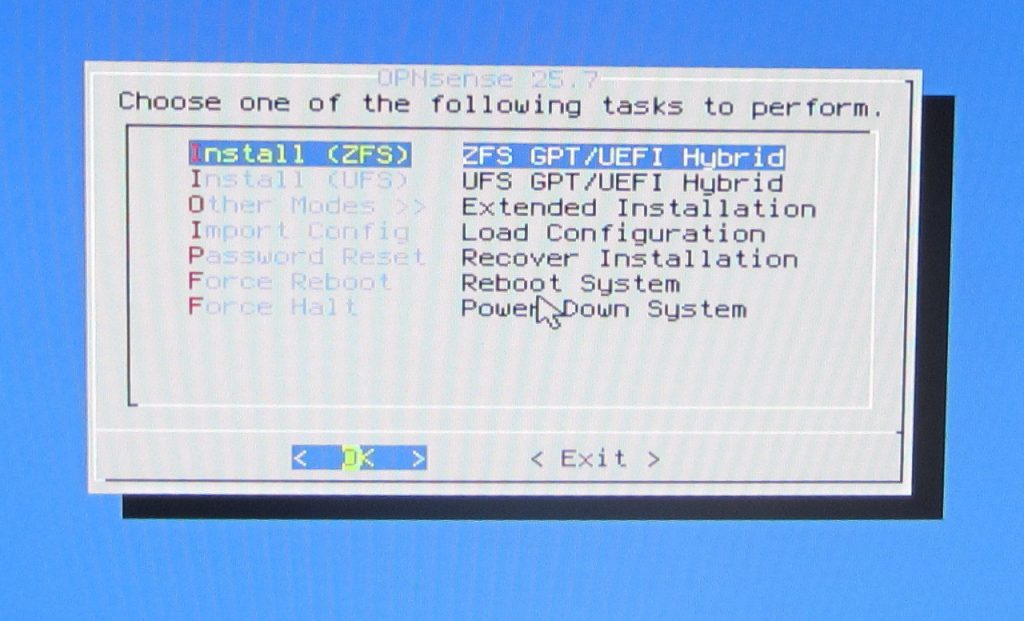
Now we’re ready to install the system, in the option selection type installer and we’ll be prompted to this scene below:
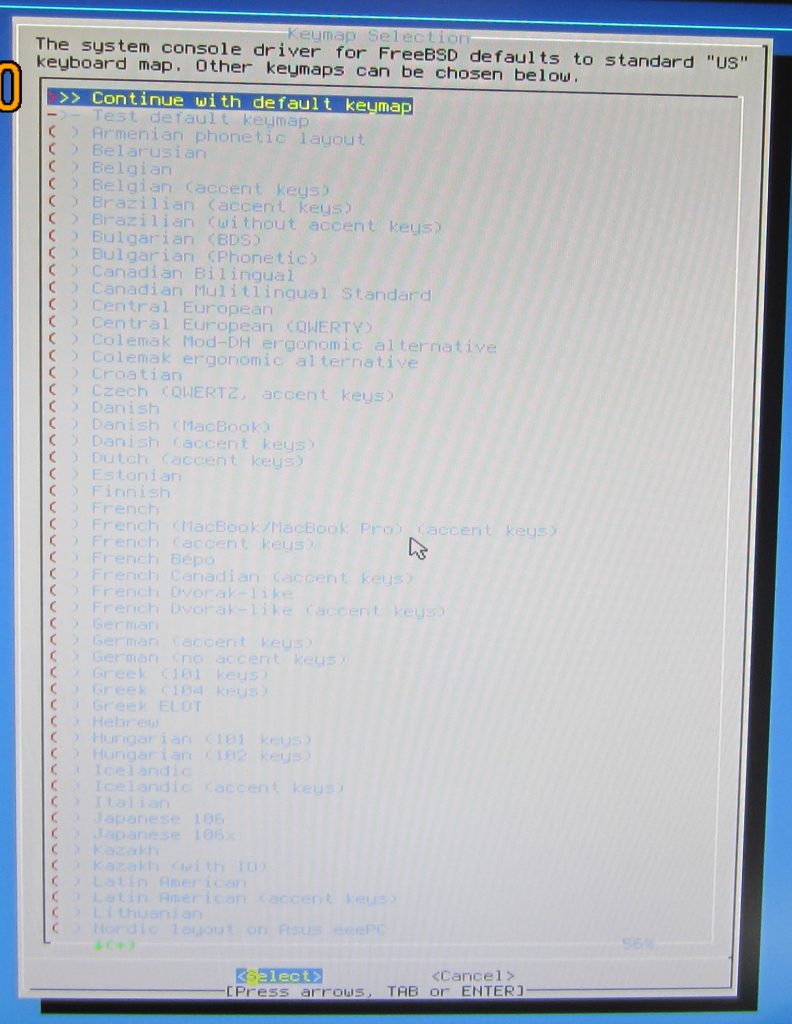
Select you’re appropriate keyboard layout, then select the appropriate file system to install. OPNsense documentation recommends to select ZFS as the file system, it has better reliability and performance. So we’re going to select that option:
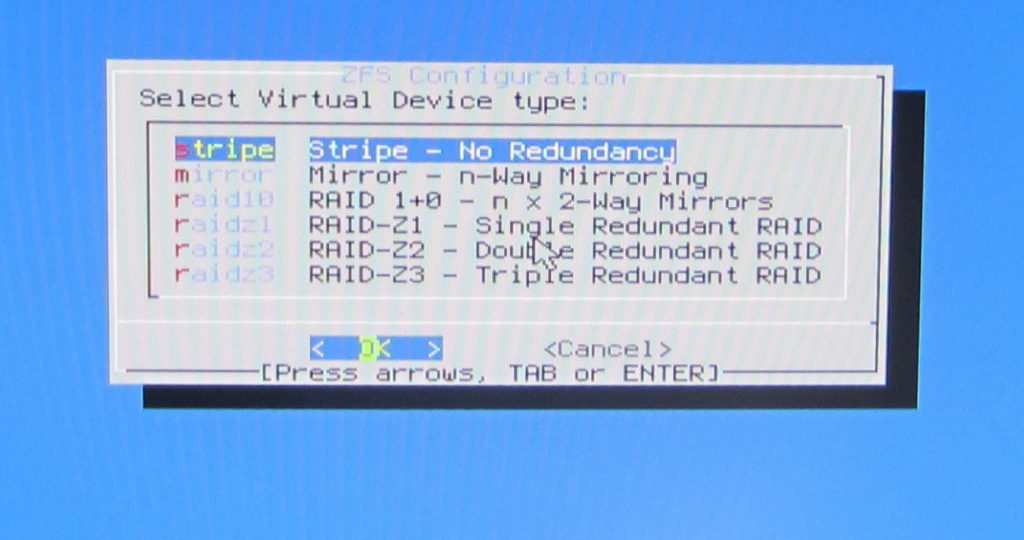
We’re prompted to select a RAID hard drive configuration, for our purposes I don’t have several drives installed and am only using a single one. So we’re going to select Stripe for our setup:
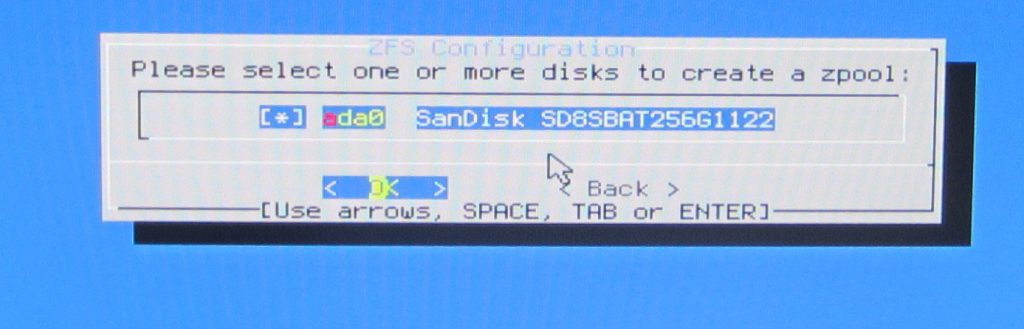
It’ll pull up the available hard drives (or disk pools that it detects), so confirm the one we’re going to be using. One good side point that I gotta say BSD has going in it’s favor is that it distinguishes between drives installed and doesn’t include the USB drive we’re using.
It’ll confirm the drive name you want to name, I typically just let it auto name it as zroot and confirm the selection.

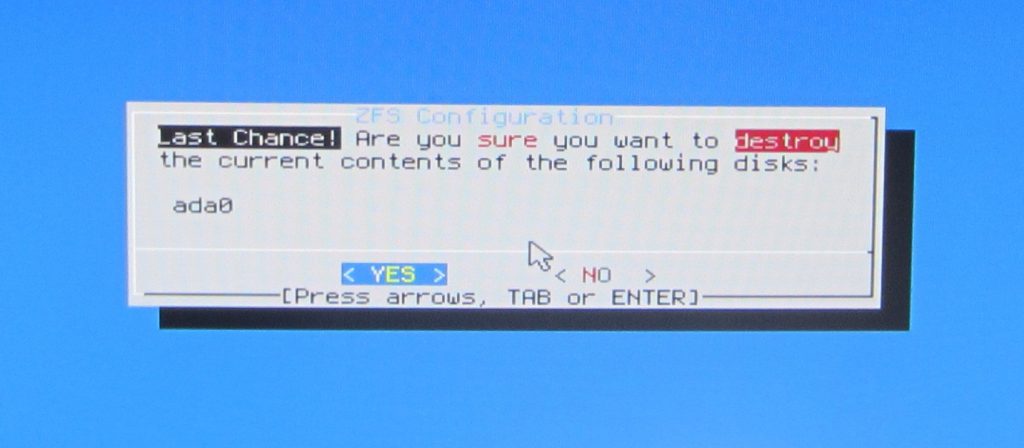
Lastly it’ll ask you to confirm final changes, we confirm yes and let the installation proceed.
Once installation finishes installing we’re going to select the option to change the root password or restart the system this will confirm the installation to take place but if we select the restart option we need to make sure to remove the USB installer media when it prompts us to. In my case I want to take advantage of the choice given to change the root password, and so follow the prompts to do that. Going to keep this part brief since this write up is already getting pretty long. The system should then reboot and we’re ready to use OPNsense.
Conclusion and closing thoughts:
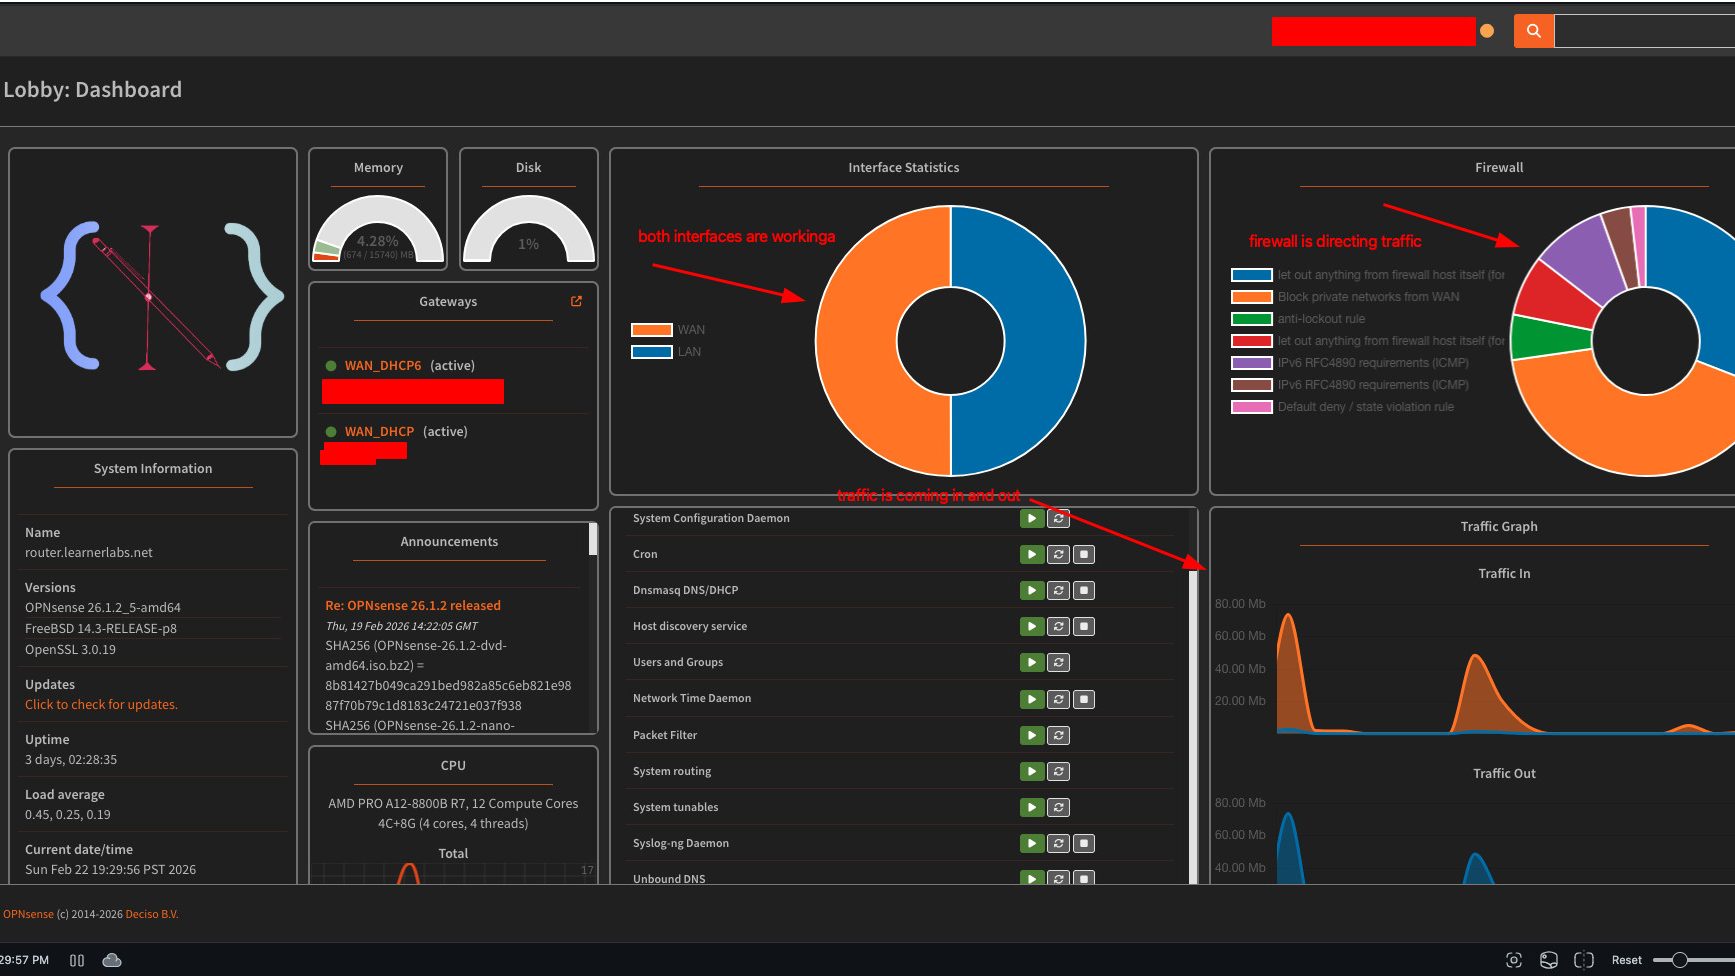
So now we’ve finished installing OPNSense on our router, if all steps are followed in these write ups so far, our router should be directing input and output traffic through our extender. We can run an ifconfig on whatever computer we have connected to our switch. And if the IP range for the ethernet connection looks like this then we’re good to go.

There likely is way more I skipped but that is the general instruction for getting OPNsense installed. We can no configure our IP addresses for each interface, and configure other settings. But we’re going to work on that next weekend, the only real challenge with this install is marking and knowing which connection we’re using for the WAN and LAN interface. But I can confirm at least that there’s traffic coming and going and we will leave this weekends walkthrough there for now. Have fun this weekend building and experimenting, until next time my tech pilgrims.